Macbook Lightbar
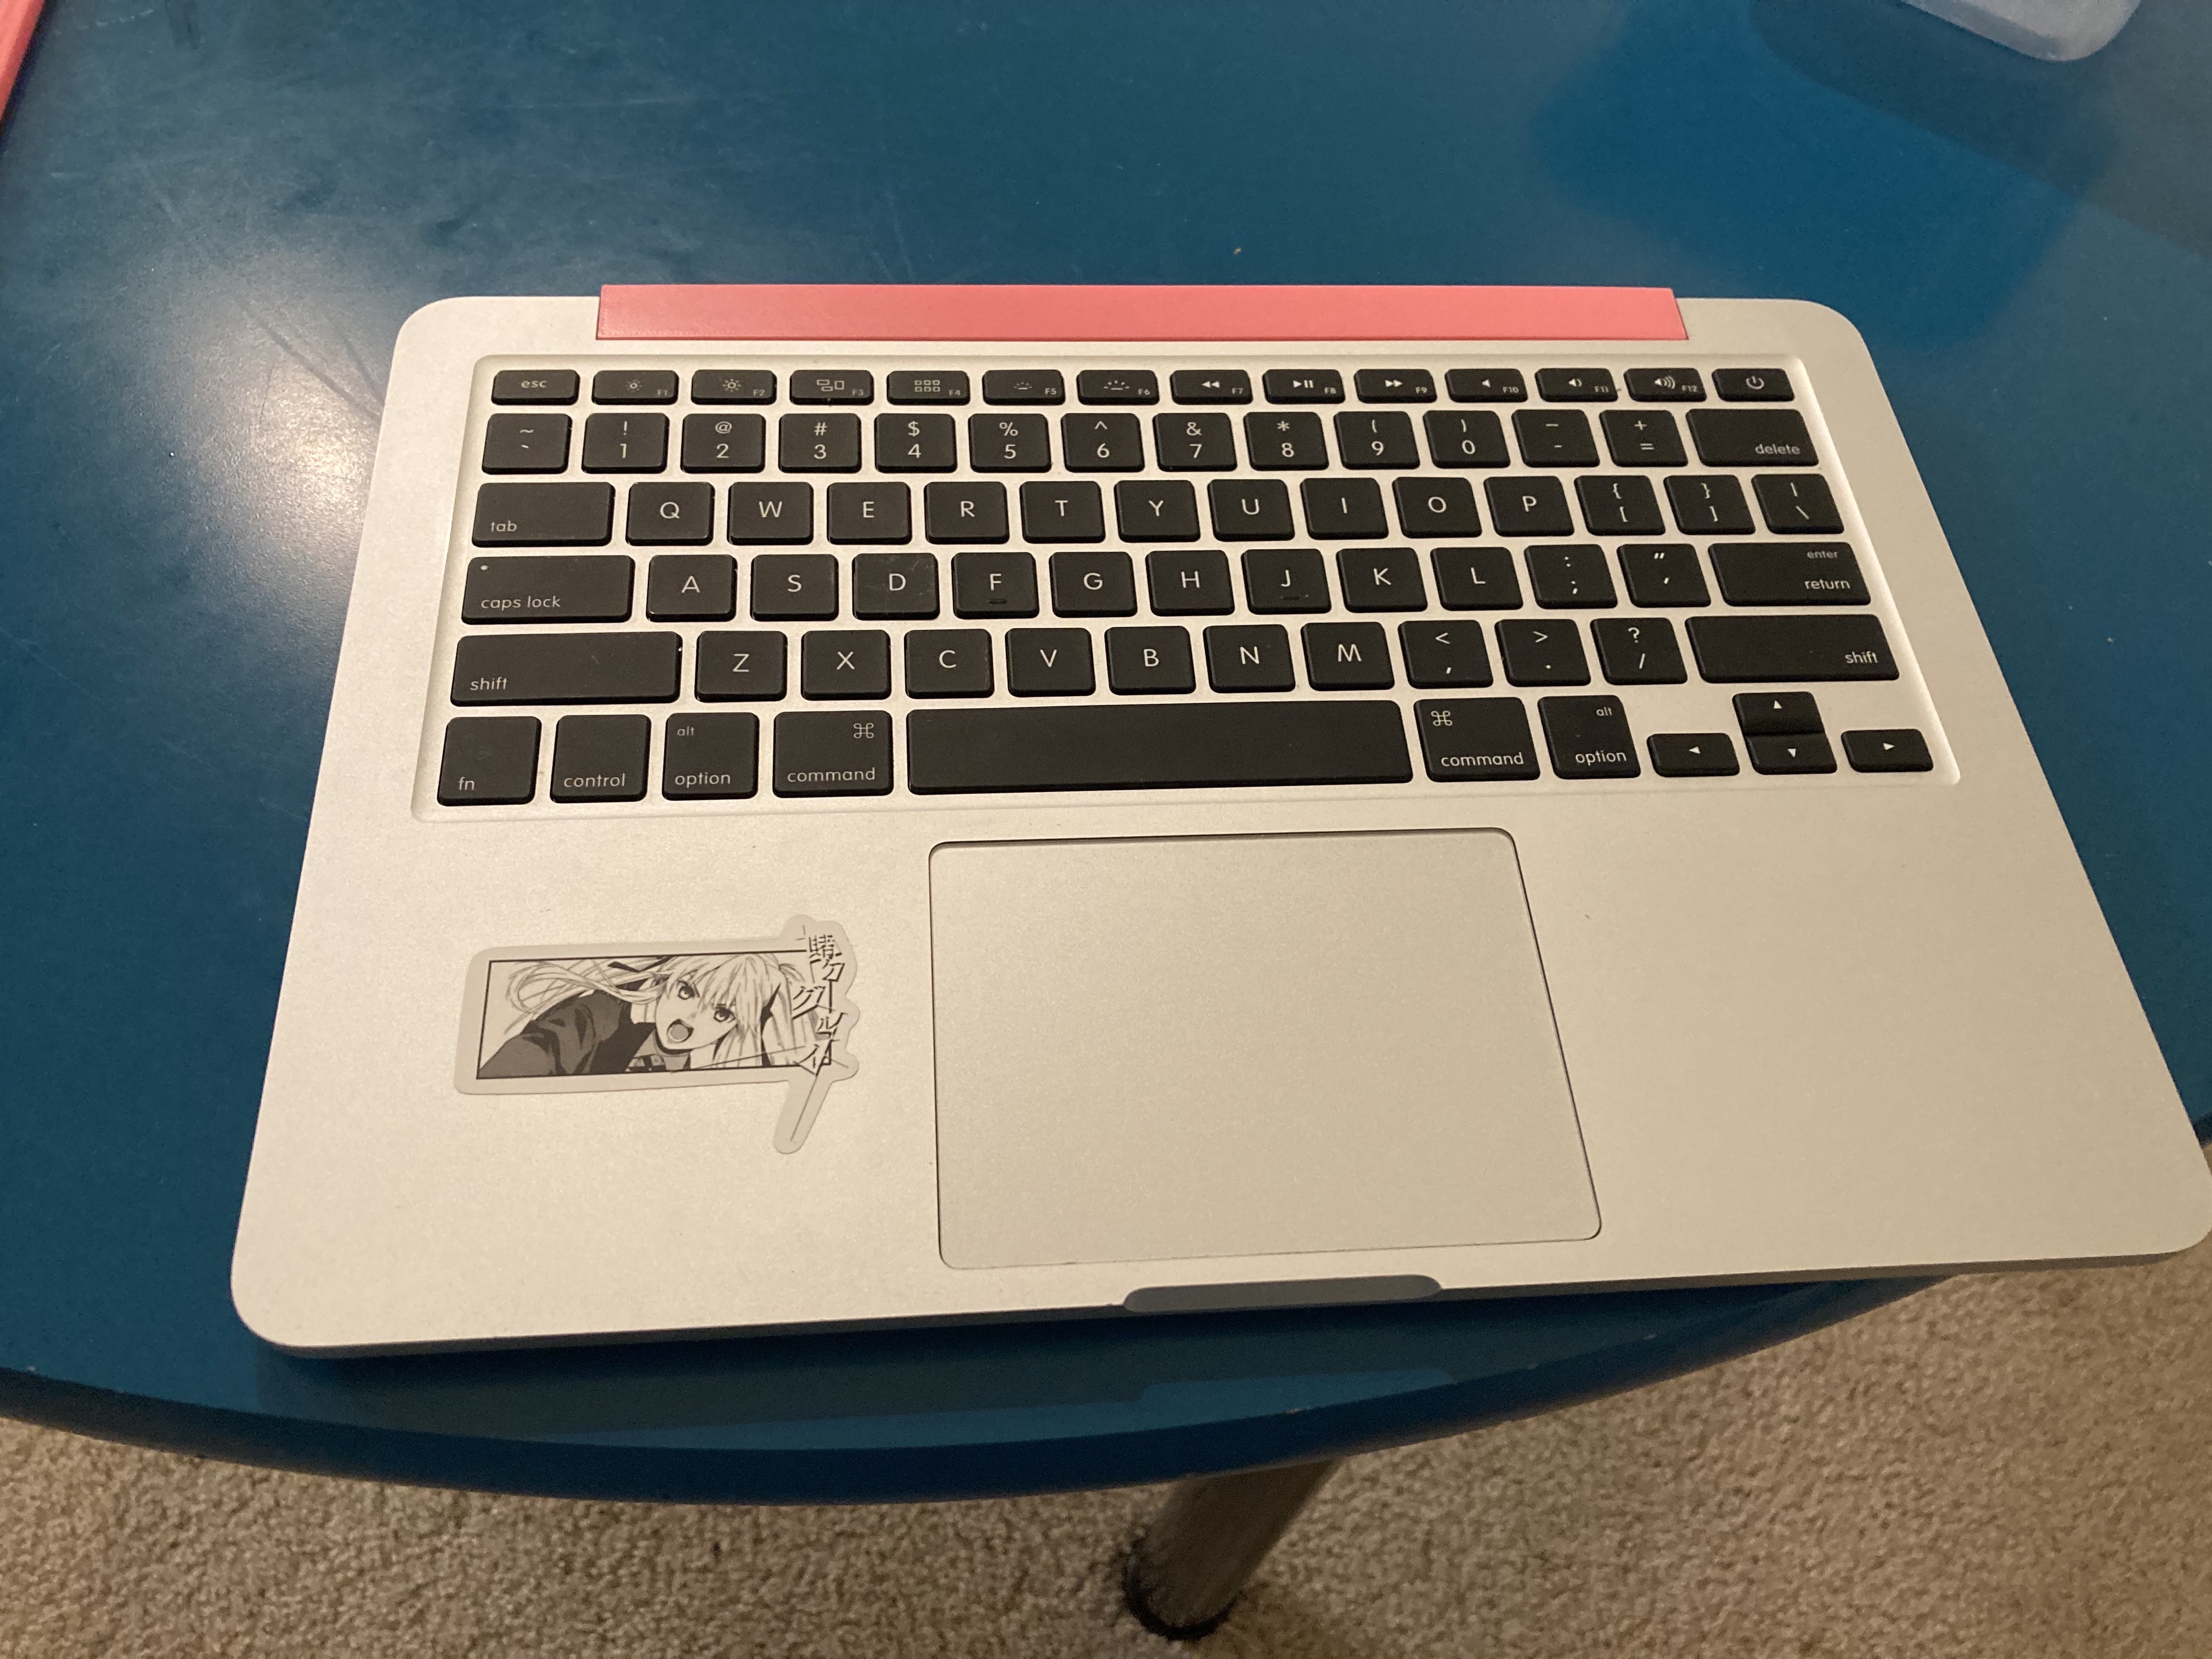
After 7 years my Early 2015 Macbook’s battery was barely working and on its last legs. After getting a new battery from iFixit I opened my MacBook and replaced it. I booted it up and noticed there was a bunch of smudges / damage on the screen. I realized that some of the alcohol I used during the installation process sept through the keyboard and got onto the screen and caused damage. At this point I decided to just remove the screen and use it as a headless MacBook. [antenna pic]
After removing the screen I just had to deal with the antenna since it was originally housed inside of the screen hinge. I was planning on just 3d printing an enclosure for the antenna, but my friend (jokingly) said I should make it RGB. Thinking about it for a bit I knew that would look sick and went to work.
First step was working on the housing, after many hours I got a working print that could fit in the gap that the screen left and hold the antenna and RGB strip. [solidworks pic]
I realized I blocked a lot of the airflow so I added some vents [pic of vents]
Next I had to figure out how to mount the enclosure to the laptop frame. I created plugs that fit in both ends of the strip and then I create a print that had screw holes to hold the plugs down. [pics]
First 3D printed prototype
Next step was to work on electronics.
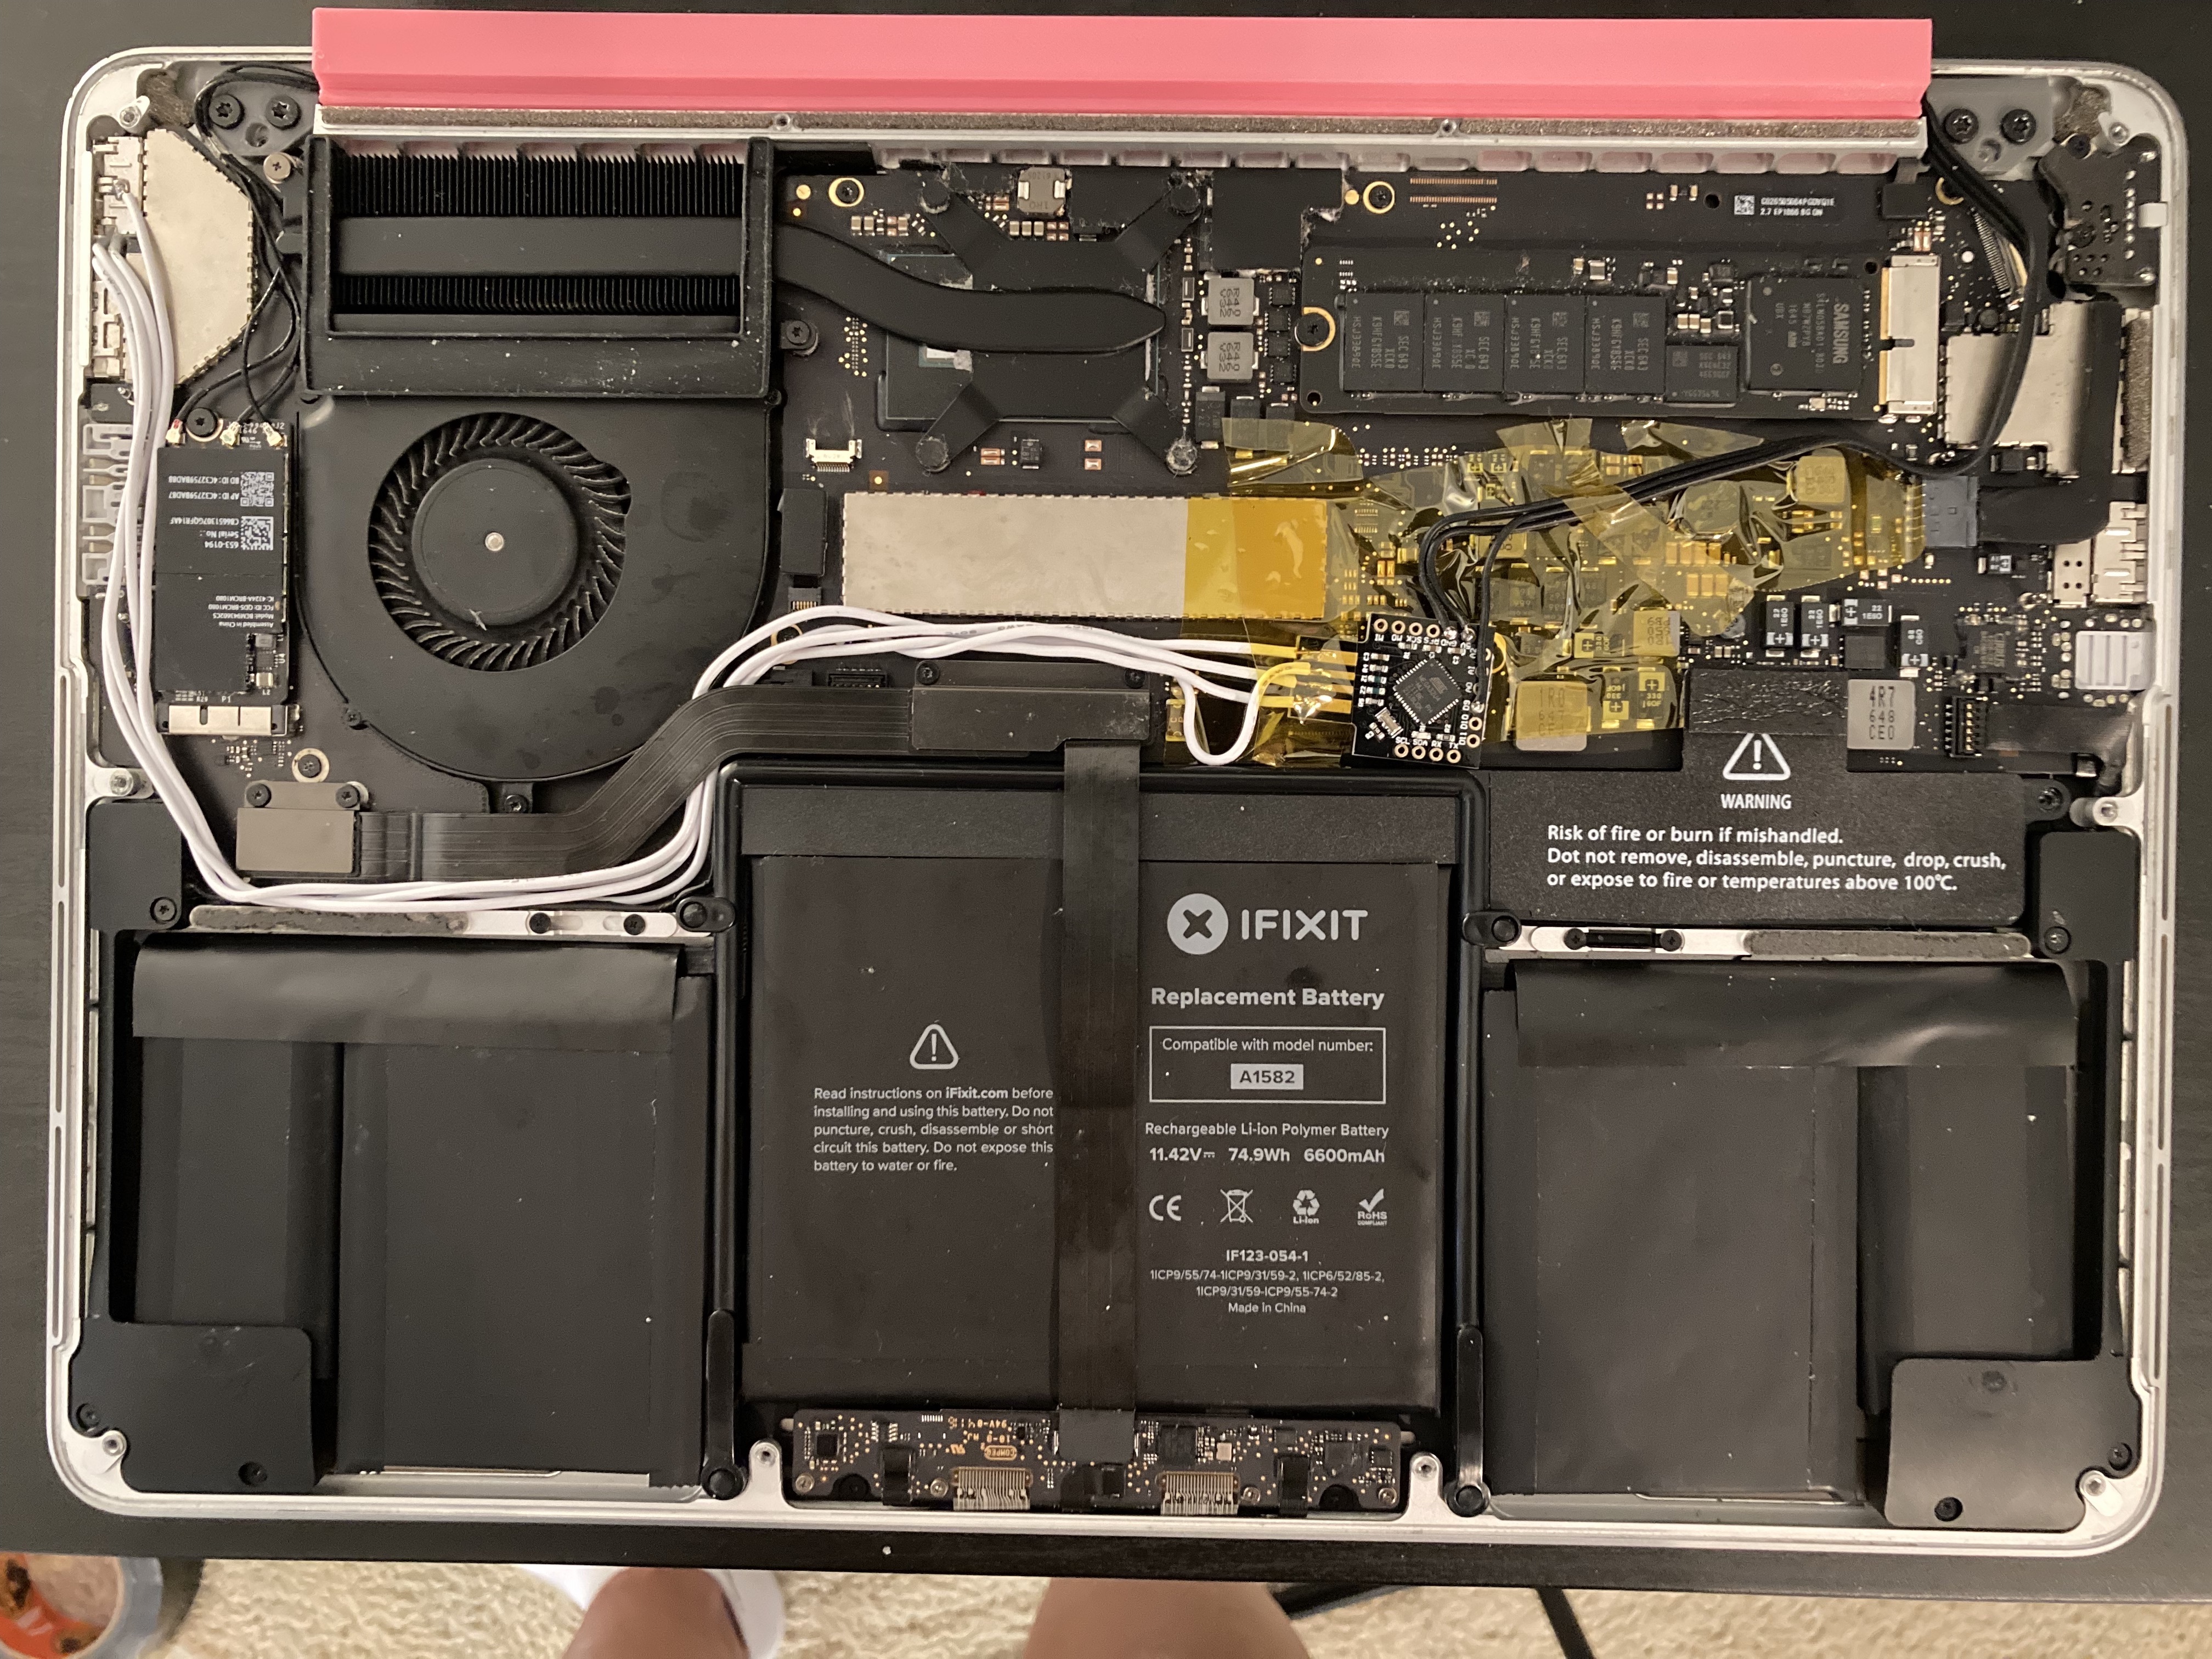
I decided to use the USB port for powering and controlling the light strip. The benefit to this setup is that the USB port has more power protection. The USB port also allows me to control the light strip over serial and re-flash the board on the fly.
For the MCU I went with a generic Beetle USB ATMEGA32U4. This board gives easy access to USB pins and it was small enough to fit inside the MacBook. It also supports USB serial communication. For the LED strip I chose Adafruit Mini Skinny NeoPiexels (TODO link) since they have a smaller size than the standard strips.
Wiring was pretty straightforward,
[USB PORT]<——>[MCU]——>[RGB Strip]
Unfortunately I couldn’t find any way easily access the USB port connections so I had to cut off the metal shielding a bit.
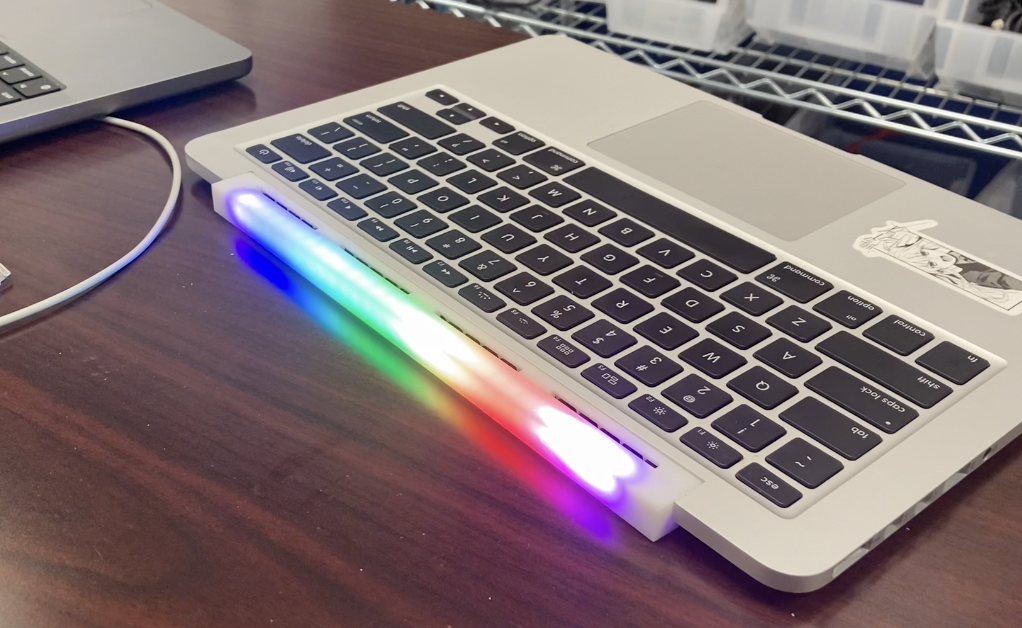
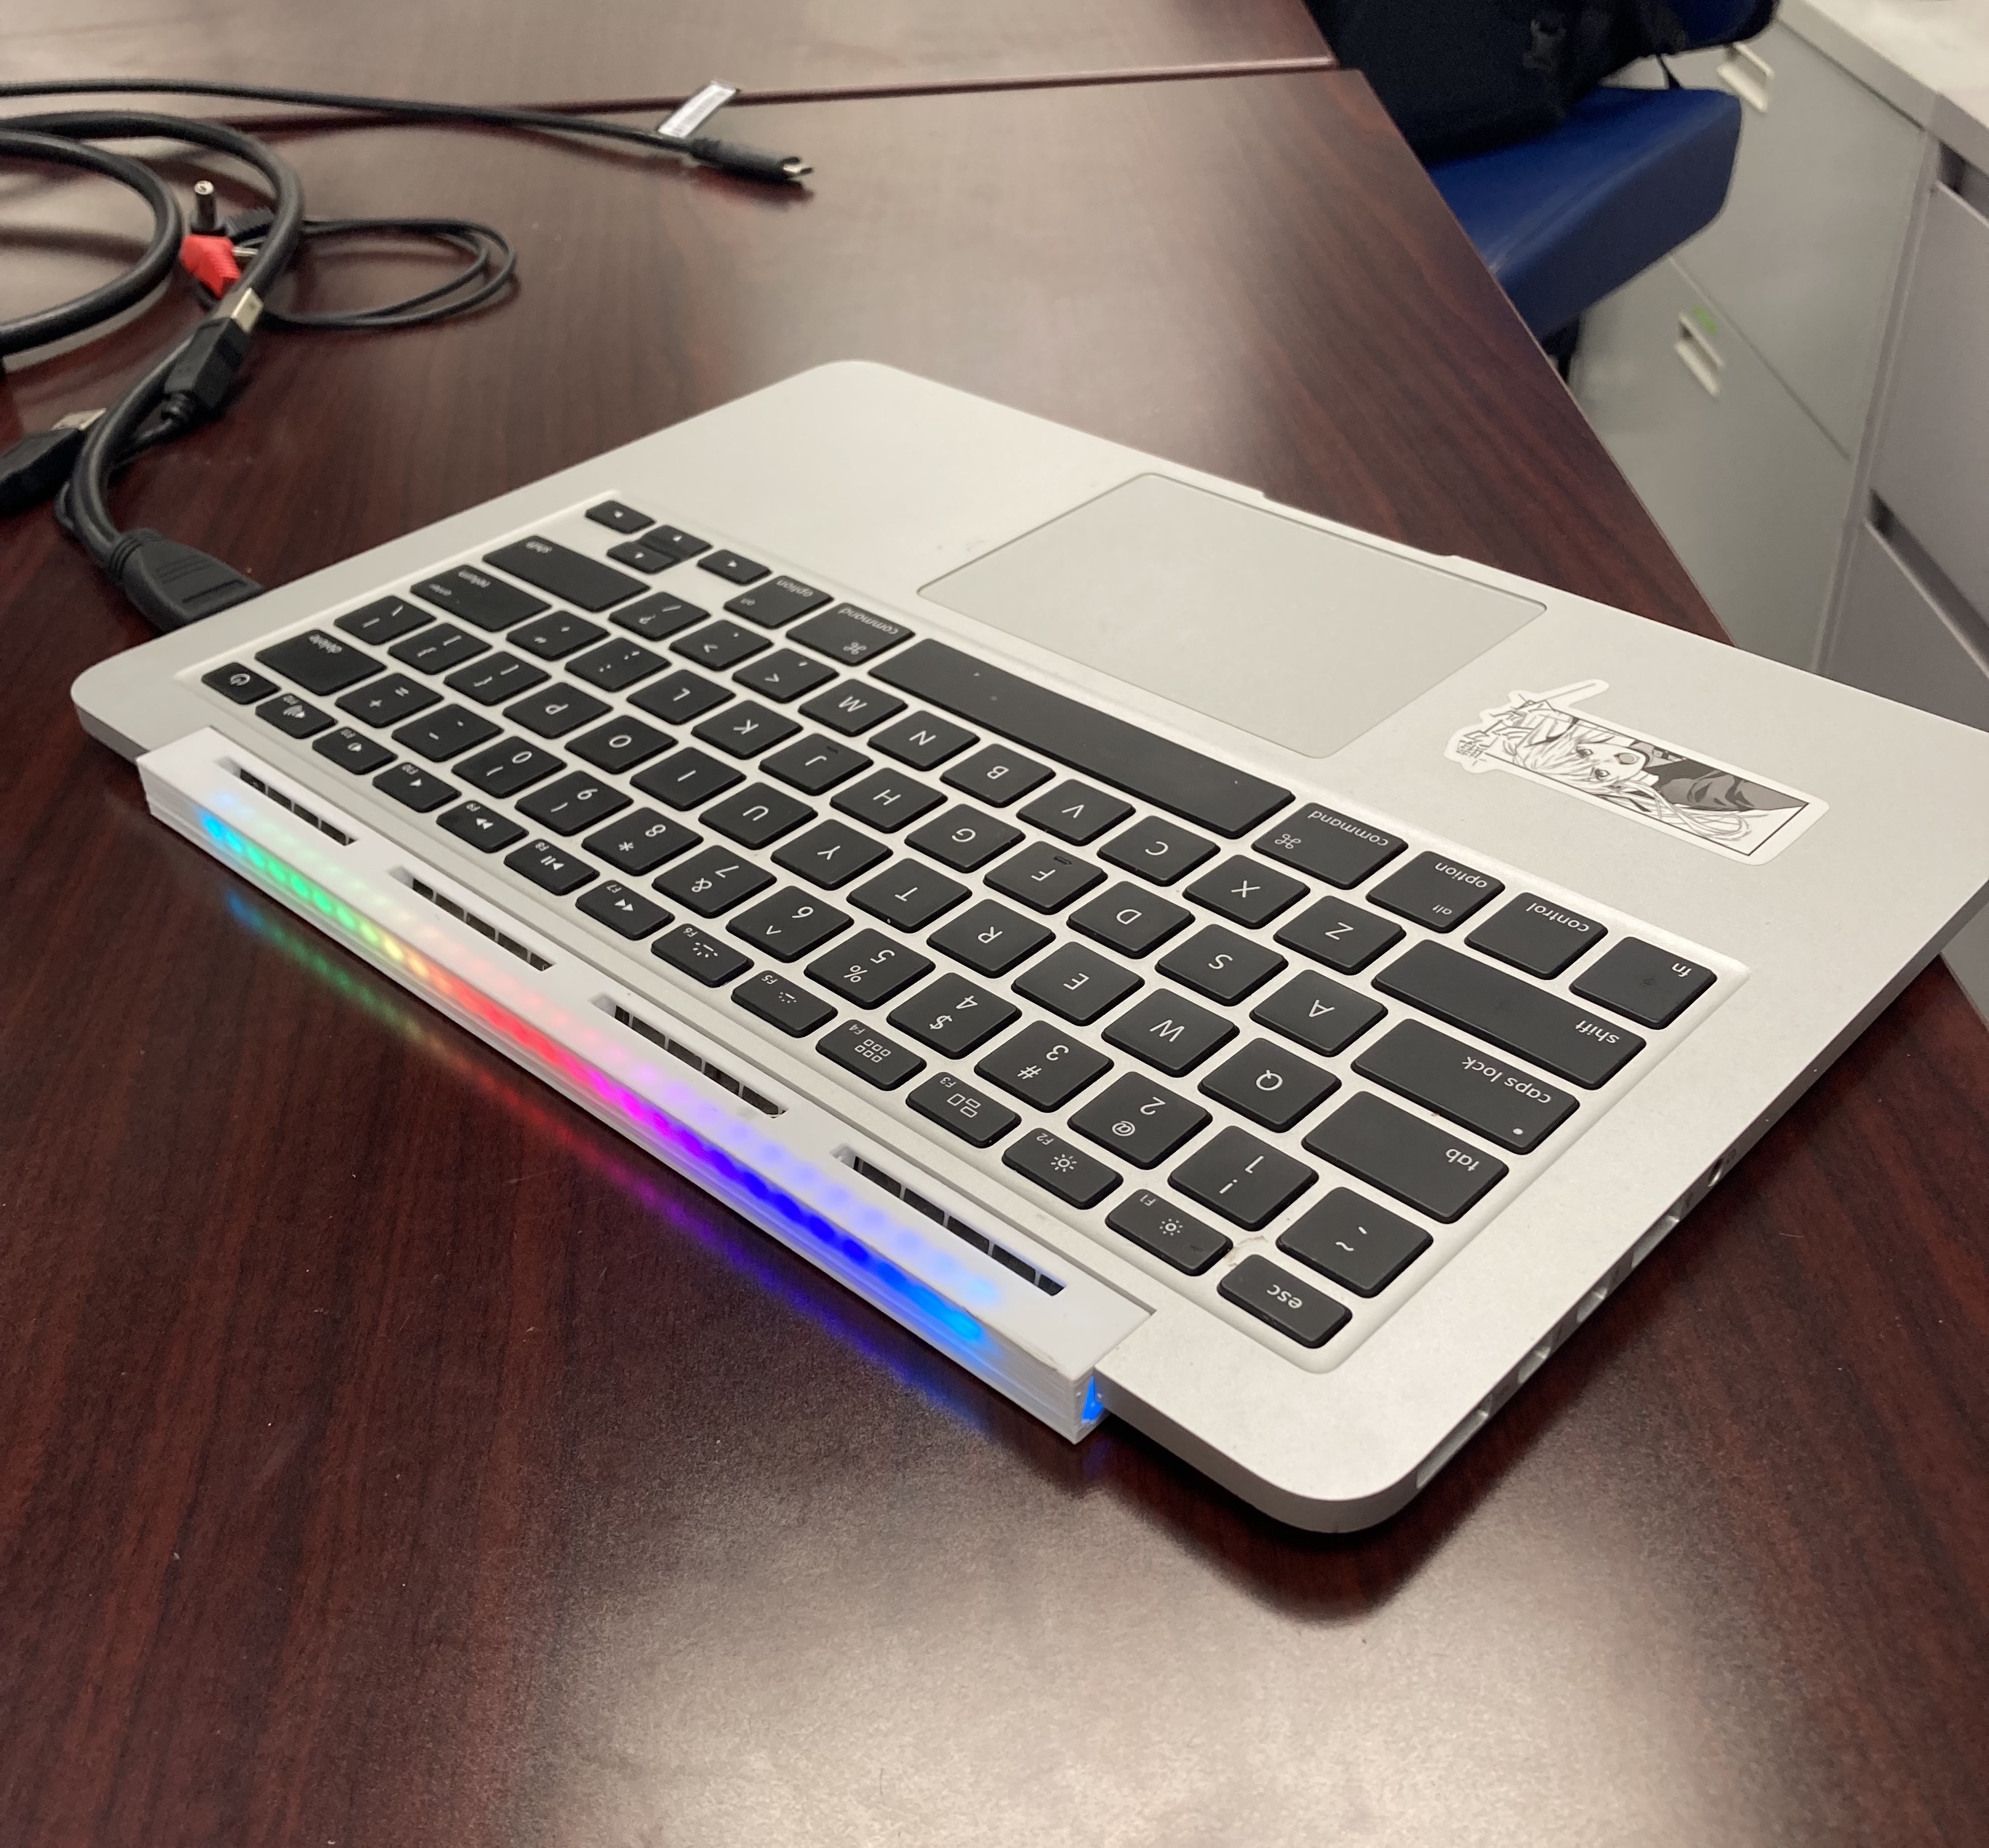
After putting it together here was the first prototype
Got some white filament so the colors can diffuse through
Once I knew everything fit properly I ordered SLA resin print from JLCPCB. The resin diffused the light much better than the PLA print
Code Code pretty straight forward. [script code]
Since communication to the light bar is done over serial it convenient to interface with it on MacOS.